


vie-magazine-diy-home-maker-guide-hero
Home Maker
Photography by Rinn Garlanger
Feeling crafty? These fun and simple DIY projects are the perfect way to exercise your creative spirit—and give your home an instant update.
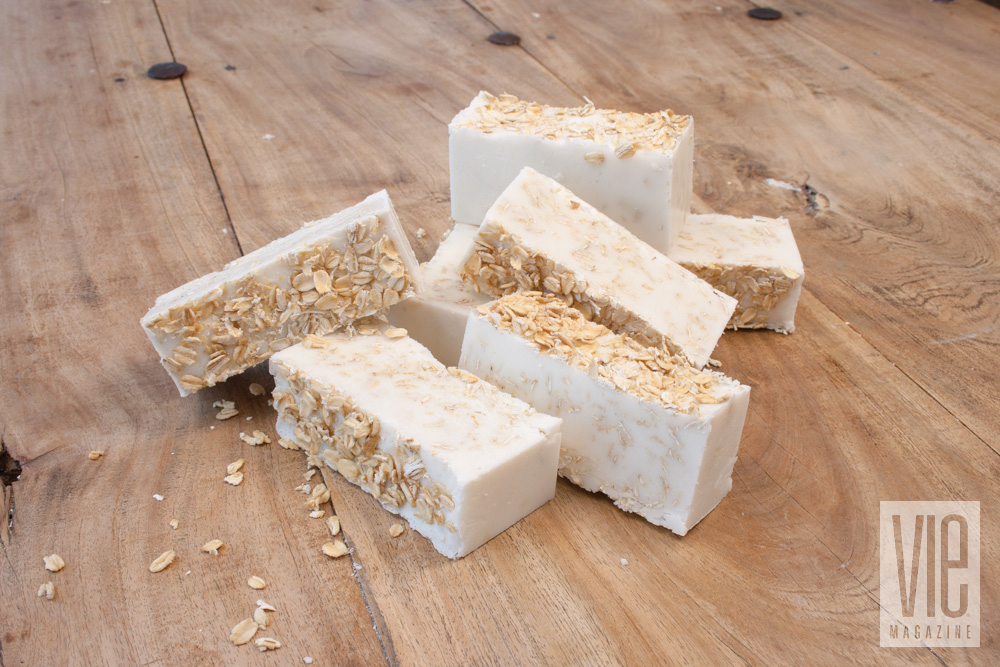
HOMEMADE OATMEAL SOAP
This oatmeal bar soap smells fresh and clean and will look great in your bathroom or kitchen.
Makes about seven bars.
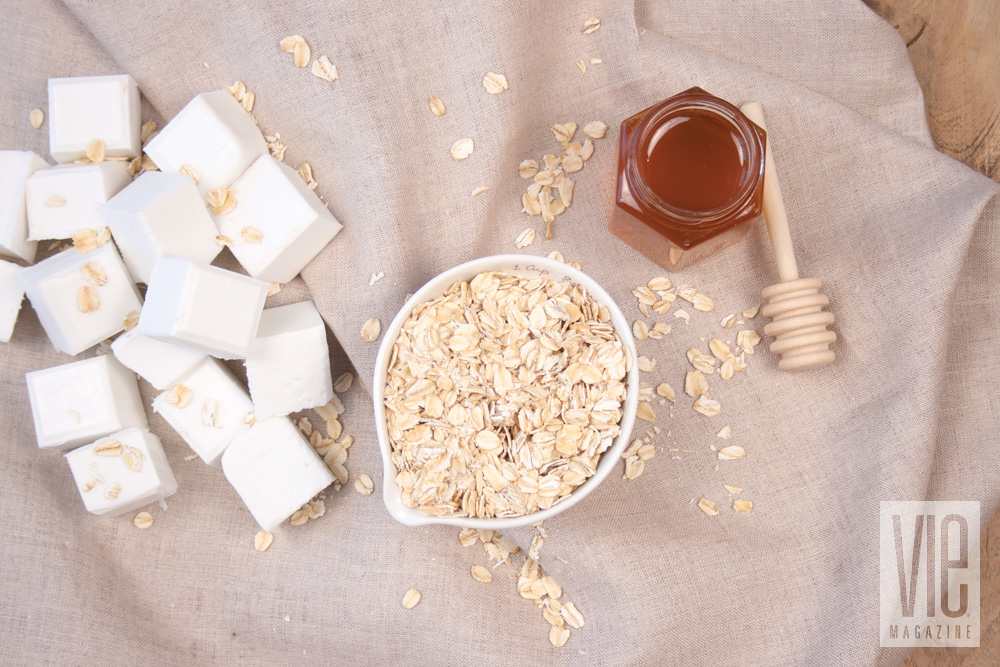
Materials
2 pounds shea butter glycerin soap base
1 cup organic rolled oats
2 tablespoons almond oil
2 tablespoons raw honey
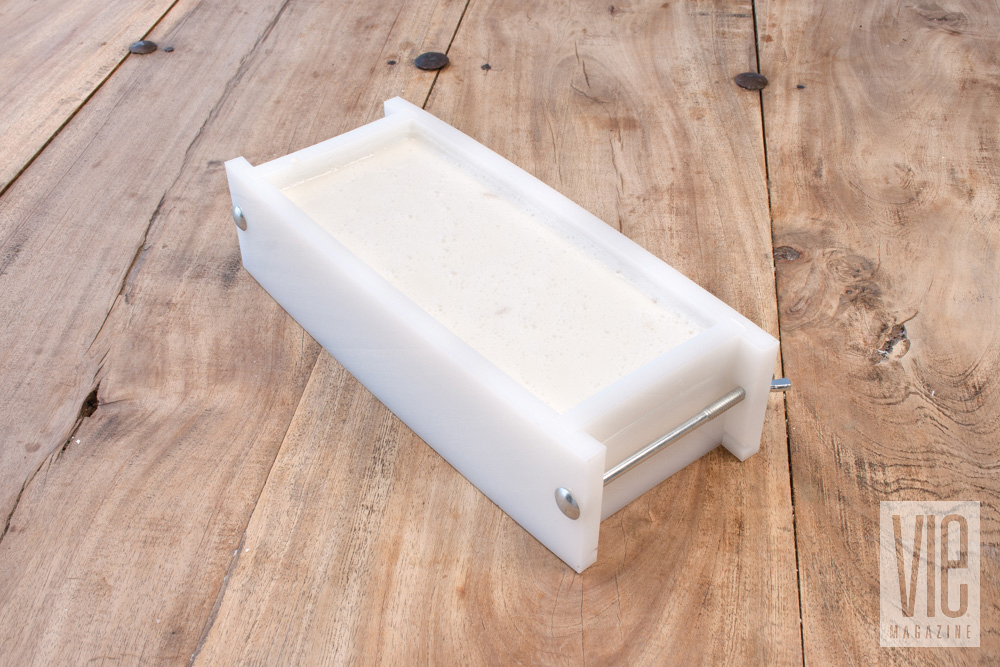
1 soap-making loaf mold
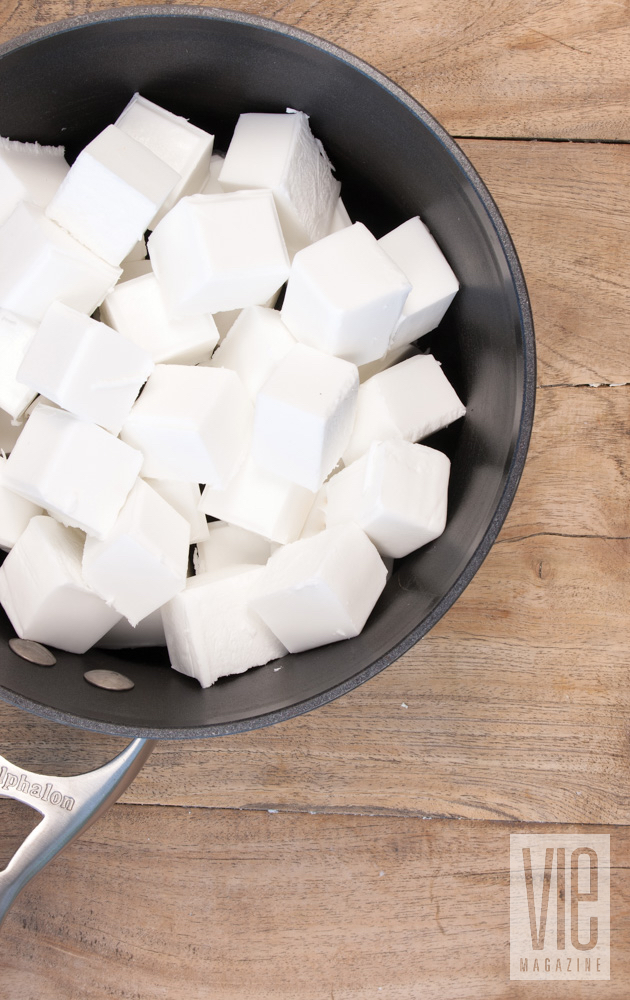
1 pot
1 soap cutter or sharp knife
Directions
1
Cut the glycerin soap base into small chunks and melt. You can do this in the microwave or in a pot over the stove on low to medium heat.
2
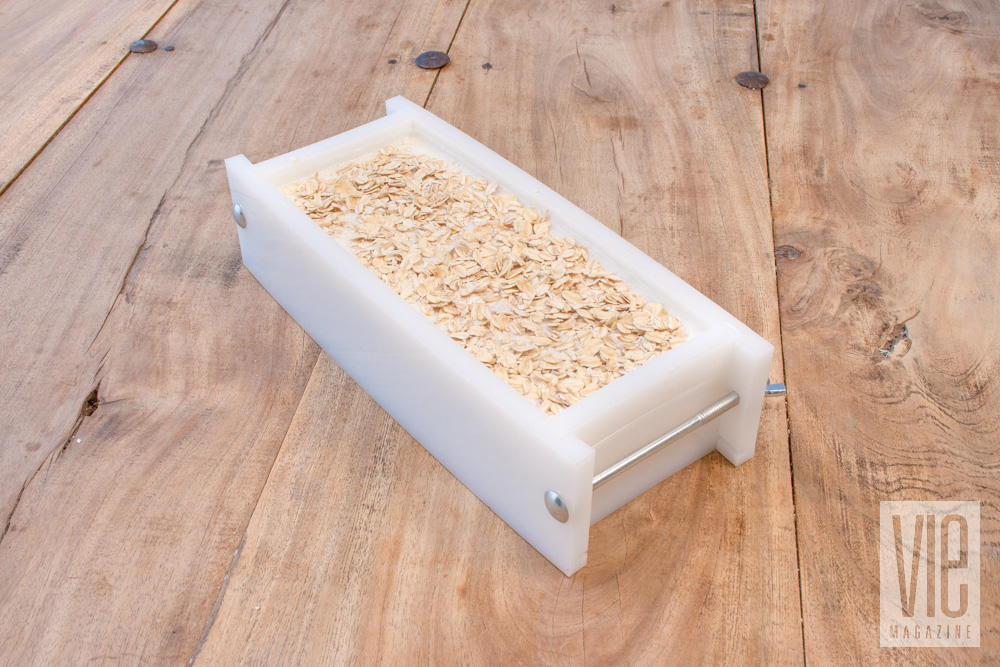
Once the soap base is melted, stir in 1/2 cup of oats, honey, and almond oil until mixed thoroughly. Carefully pour your mixture into the loaf mold.
3
Sprinkle the top of your mold with reserved rolled oats. Let it sit for about four to five hours to harden. (You can also put the mold in the fridge to harden faster.)
4
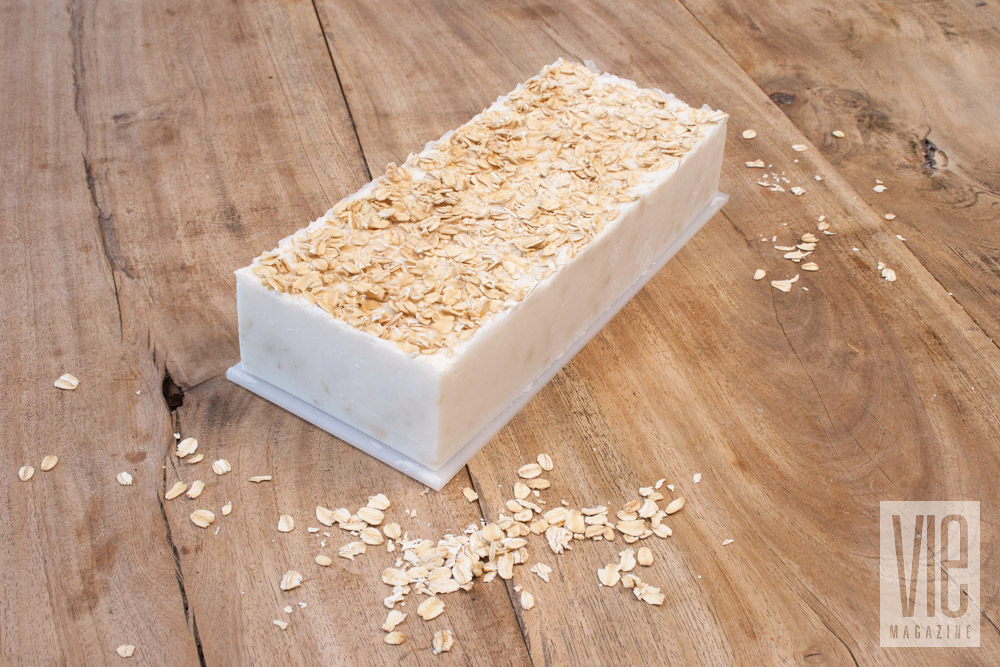
Once the soap has cooled and hardened, remove soap from the mold.
5
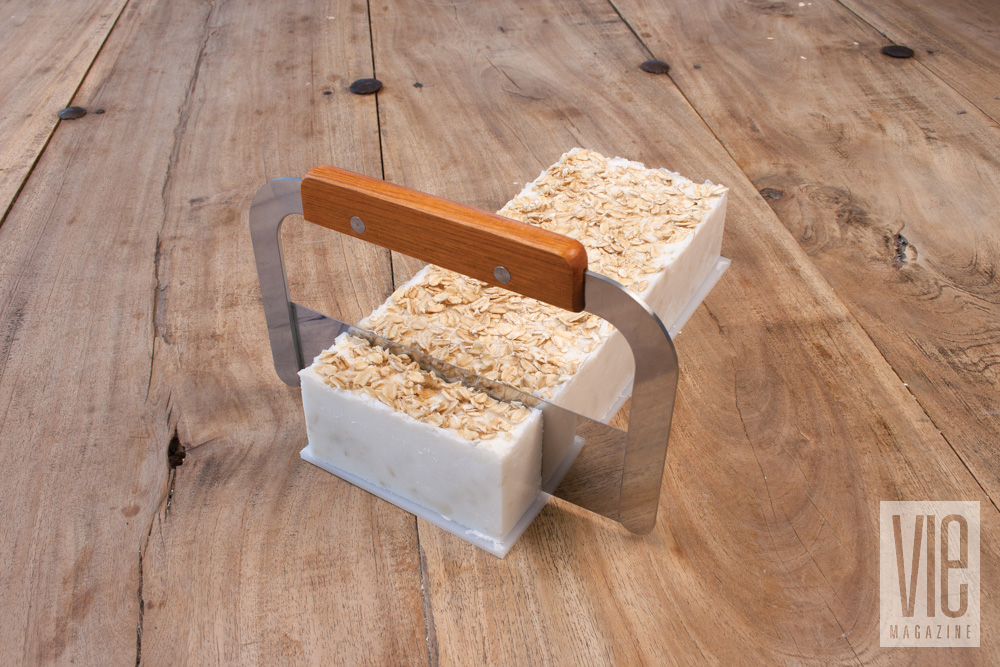
Use a soap cutter or sharp knife to cut the soap into bars.
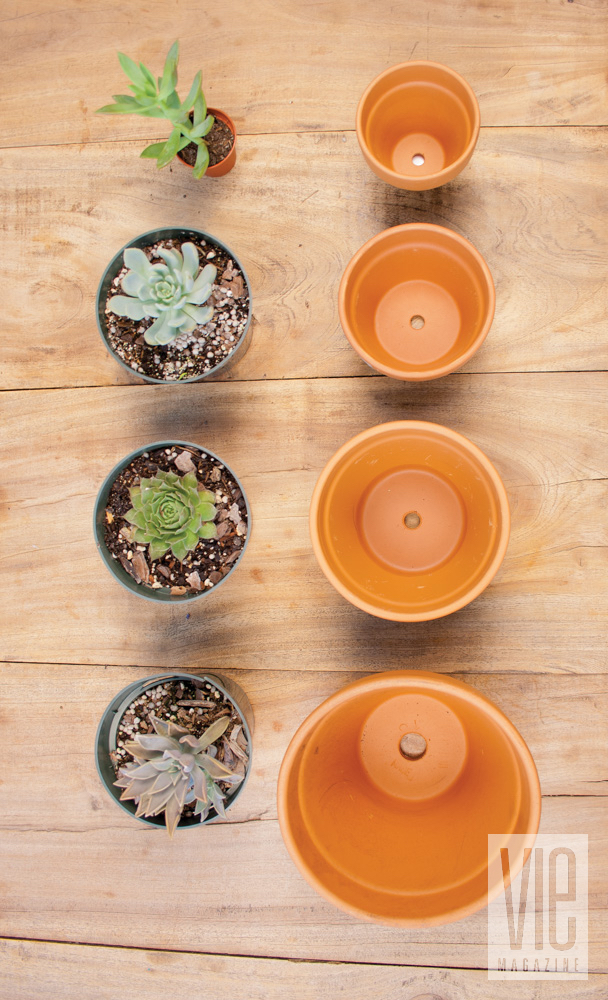
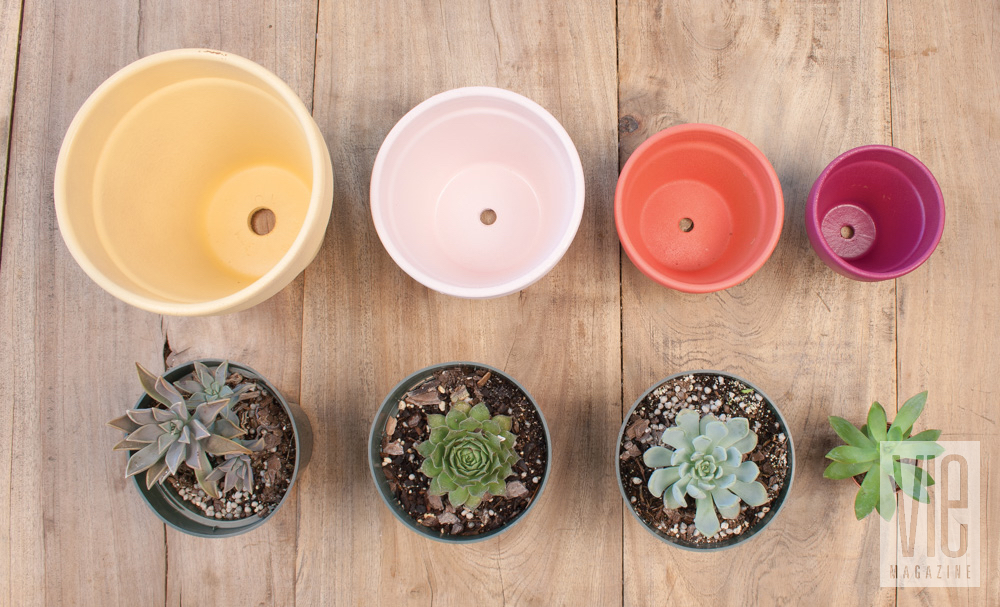
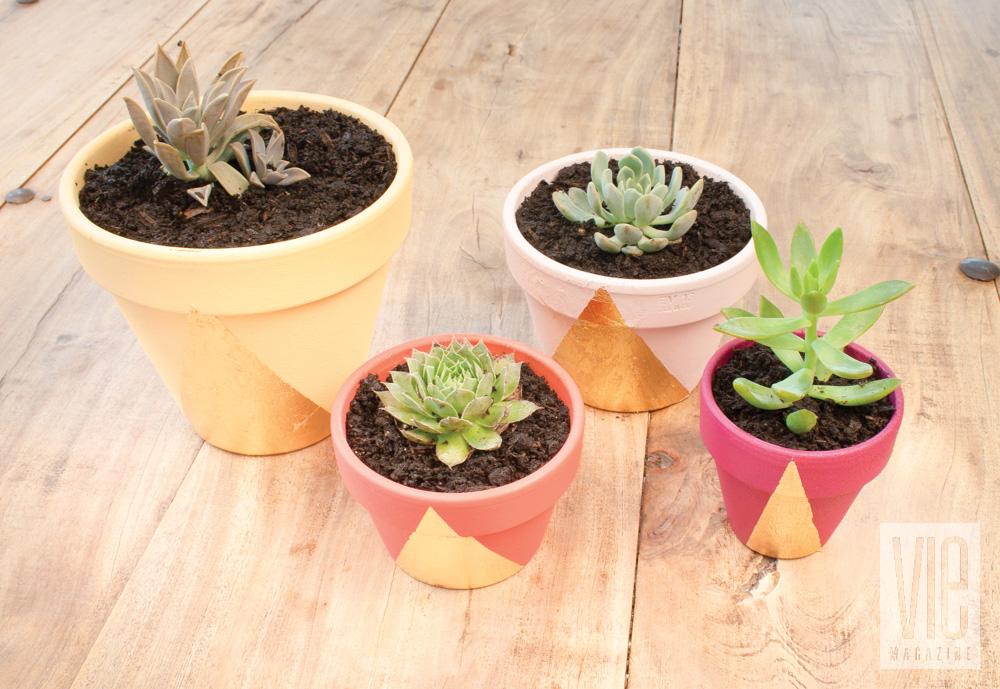
Gold Leaf Flowerpots
Add some punch to your patio or windowsill. Your plants deserve to be in style too!
Makes four flowerpots.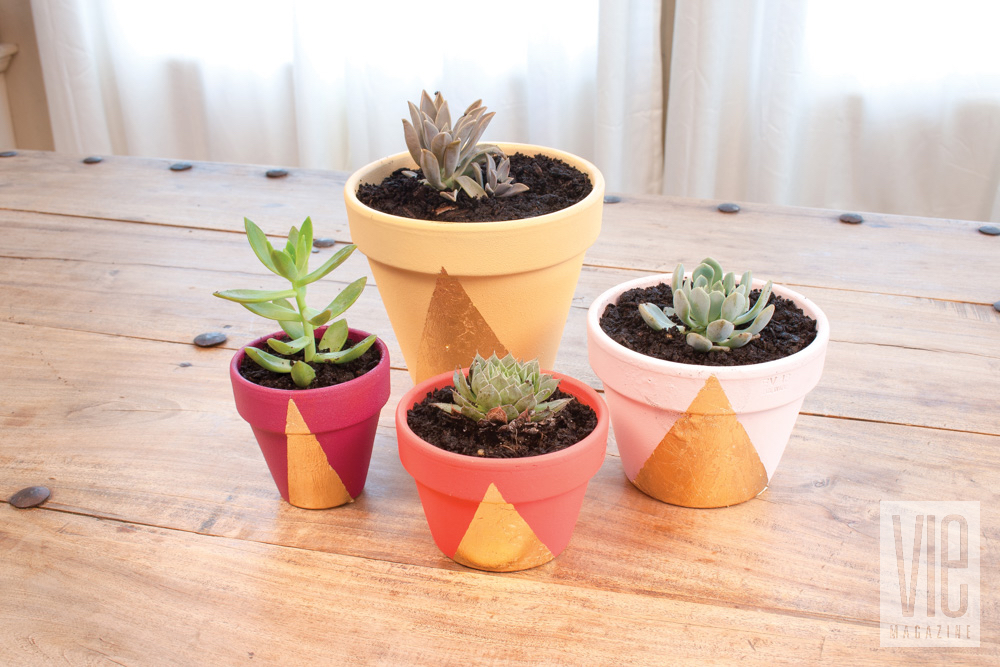
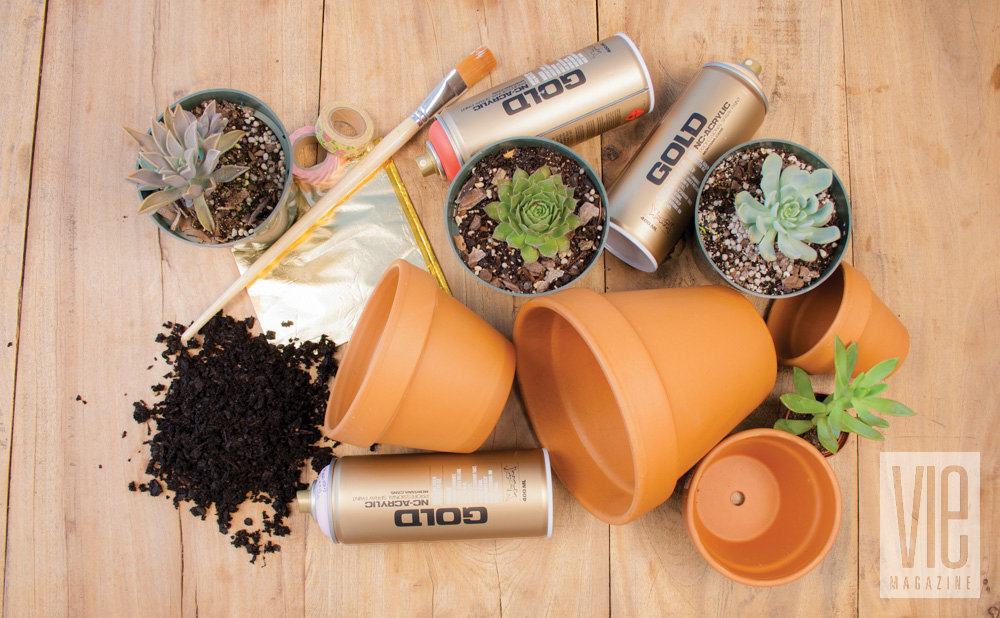
Materials
4 flowerpots (can be the same or different sizes)
4 plants (Succulents are great!)
Spray paint
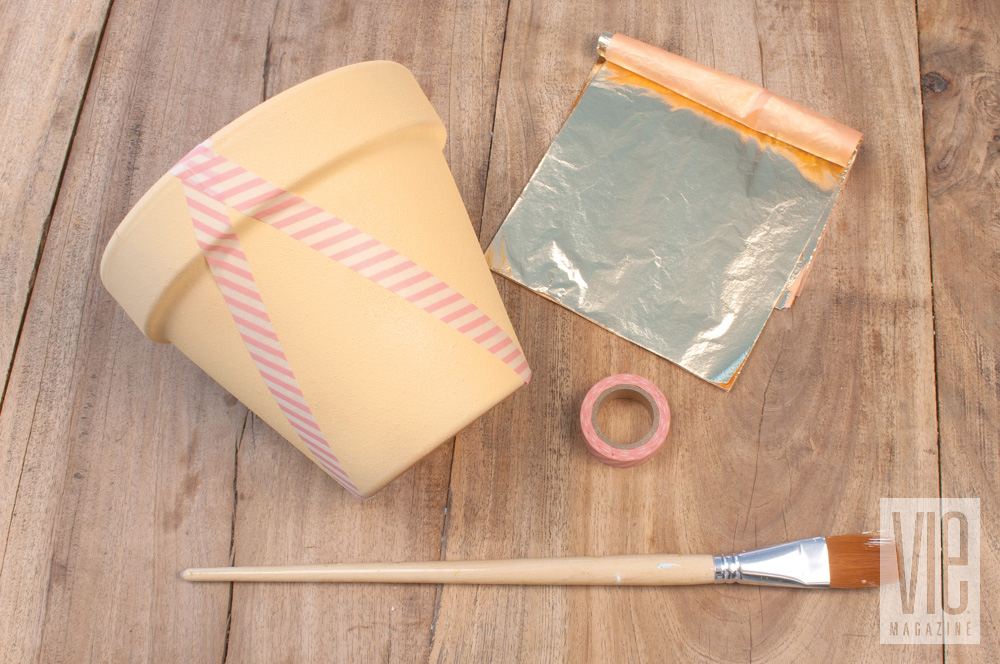
A roll of washi tape
Gold leaf kit (can be found on Amazon.com)
Small paint brush
Potting soil
Directions
1
Spray paint the flowerpots in colors of your choice. (A couple paint coats will do.) Let them dry completely.
2
Apply washi tape to section off the area you’d like to gold leaf. Then apply a thin layer of glue to the area so the gold leaf can stick. Brush on the gold leaf and let it dry, then remove tape. Optional: If your planters will be placed outdoors, spray them with a coat of clear sealant to protect them against the elements.
3
Add a layer of soil and you’re ready for planting! We chose these adorable and hearty succulents for easy maintenance, indoors or out.
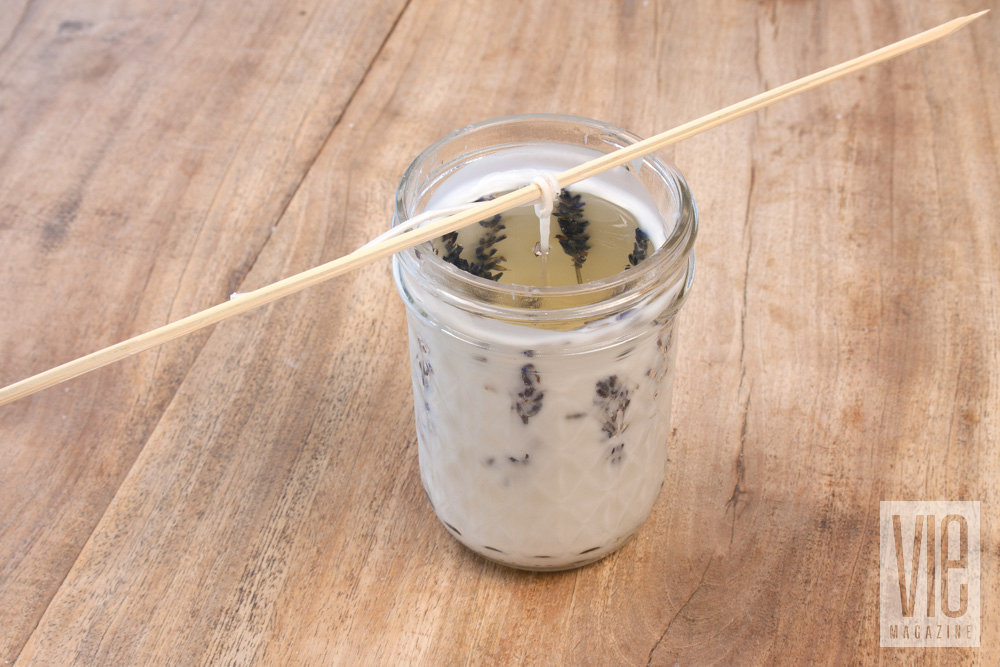
Pressed Flower Candles
Who doesn’t love a nice candle? Add instant warmth and a hint of soothing lavender to your home with these adorable mason jars.
Makes one candle.
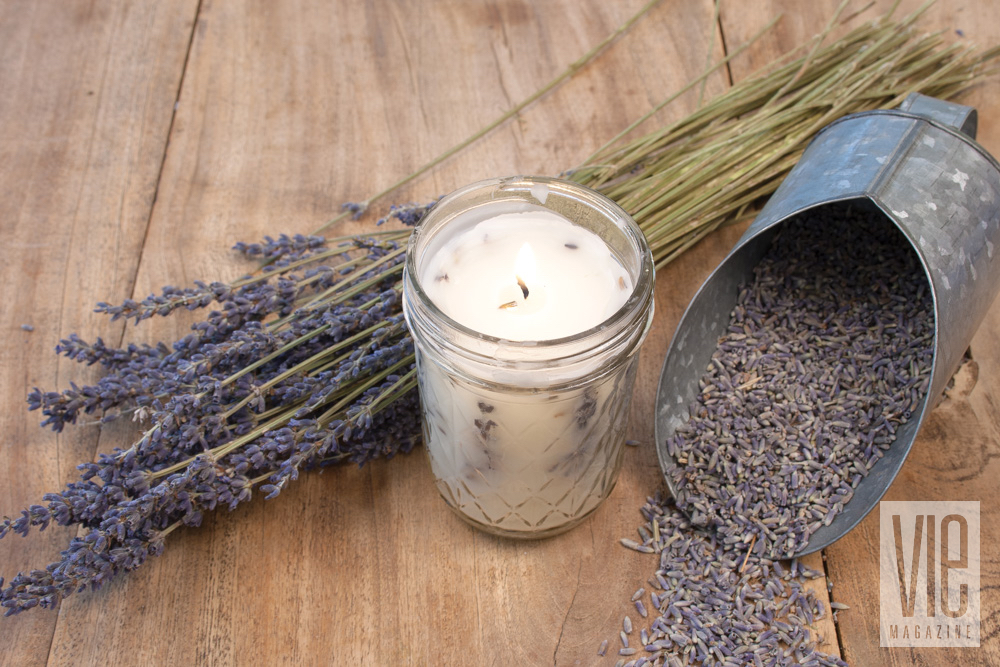
Materials
Mason jar in your choice of size
1 block of 100% beeswax or natural wax of your choice
1 natural wick
Pressed flowers or herbs
1 clean, empty can and 1 small saucepan or pot (or use a double boiler)
1 small paintbrush
Knife
Cutting board
Lavender oil

Directions
1
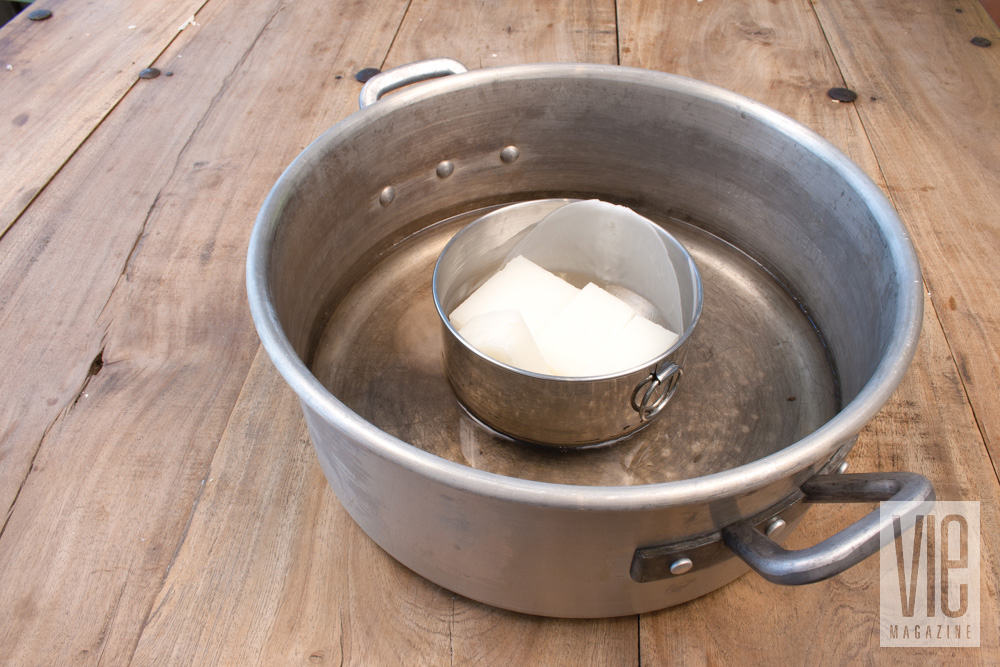
On a cutting board, use a knife to chop the wax into small chunks that will fit in the empty can.
2
Place chunks of wax into the can, place the can into the pot, and add water to the pot until it is about two inches above the level of the wax. Heat on medium until the wax is completely melted.
3
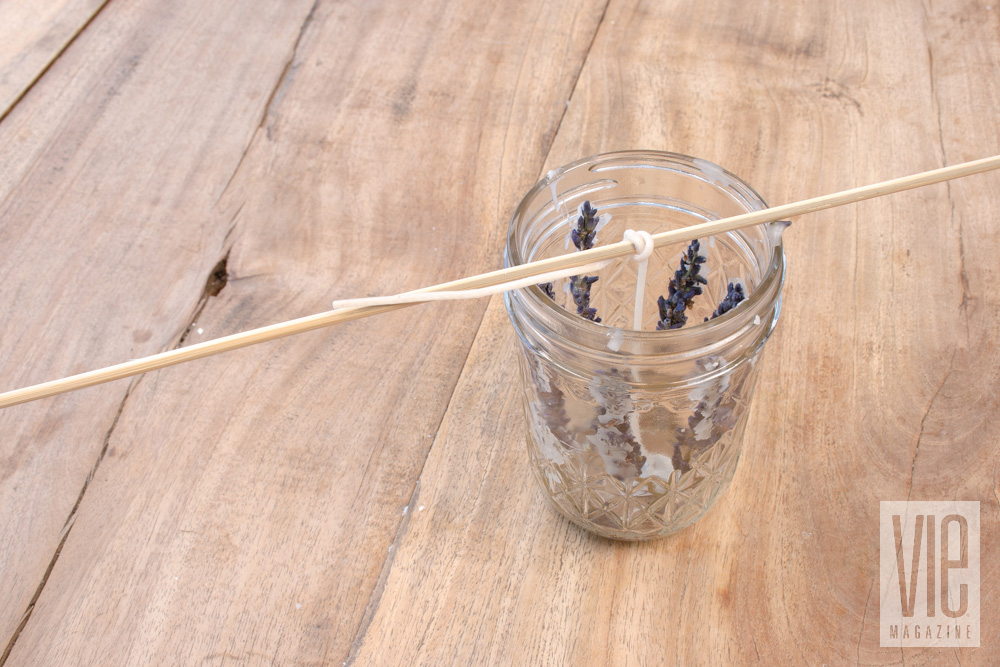
Dip the paintbrush into the melted wax, brush onto the pressed flowers, and apply flowers to the inside of your jar. Sprinkle lavender oil to coat the inside of your jar as desired. To keep your wick from sinking, gently tie it around a pencil or chopstick and set across the top of your jar. To anchor the wick, dip the metal end of the wick into the melted wax and lower it to the bottom of the jar. The melted wax will adhere the wick to the jar.
4
Use an oven mitt to carefully remove the can from the pot and gently pour the wax into your jar, filling it to about 1/4 inch from the top. Allow the wax to cool completely; trim the wick to about 1/4 inch before burning.
— V —
We’d love to see your DIY come to life. Share your favorite projects with us on Instagram by tagging @vie_magazine!
Share This Story!
KEEP UP WITH THE LATEST STORIES FROM VIE